Overview
Bài viết hướng dẫn cách cấu hình DNAT 2 lớp với 2 thiết bị Sophos XGS, 1 thiết bị bên ngoài bảo vệ toàn bộ hệ thống nội bộ và 1 thiết bị bên trong bảo vệ cho hệ thống server ở lớp DMZ
Các bước cấu hình
- DNAT cho firewall trong để public web server ra ngoài
- DNAT cho firewall ngoài để public web server ra ngoài
- Kiểm tra truy cập tới trang web
Hướng dẫn cấu hình
Firewall 2
- Đăng nhập Sophos XGS bằng tài khoản Admin
- Đi đến mục SYSTEM -> Chọn mục Hosts and services -> Chọn mục IP host -> Nhấn Add
- Nhập tên
- Ở mục IP version: Chọn IPv4
- Ở mục Type: Chọn IP
- Ở mục IP Address: Nhập 10.10.10.150
-> Nhấn Save

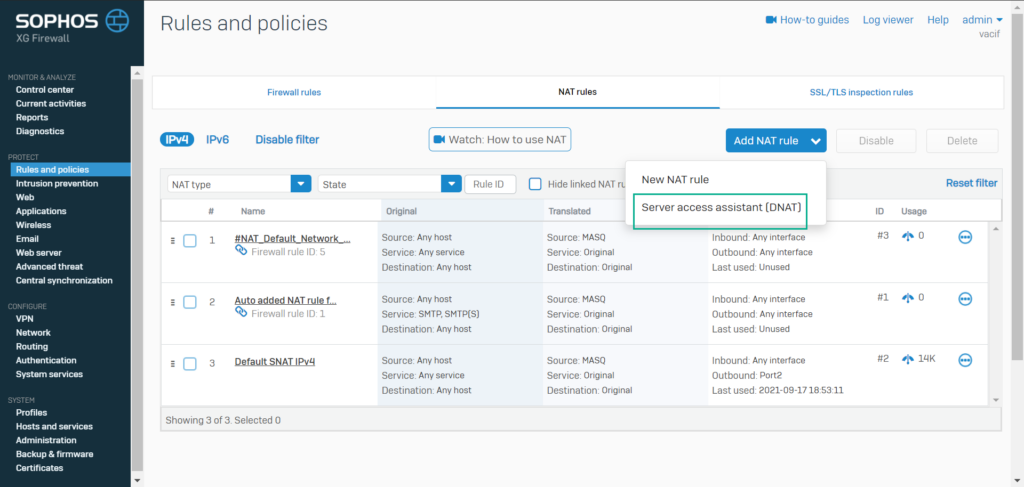
- Đi đến mục Rules and policies -> Chọn mục NAT rules -> Nhấn Add NAT rule -> Chọn Server access assistant (DNAT)
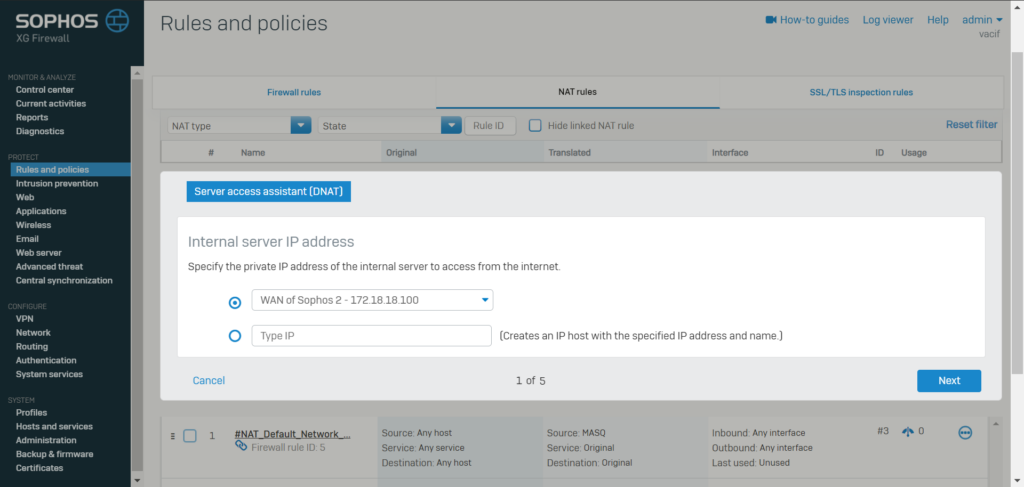
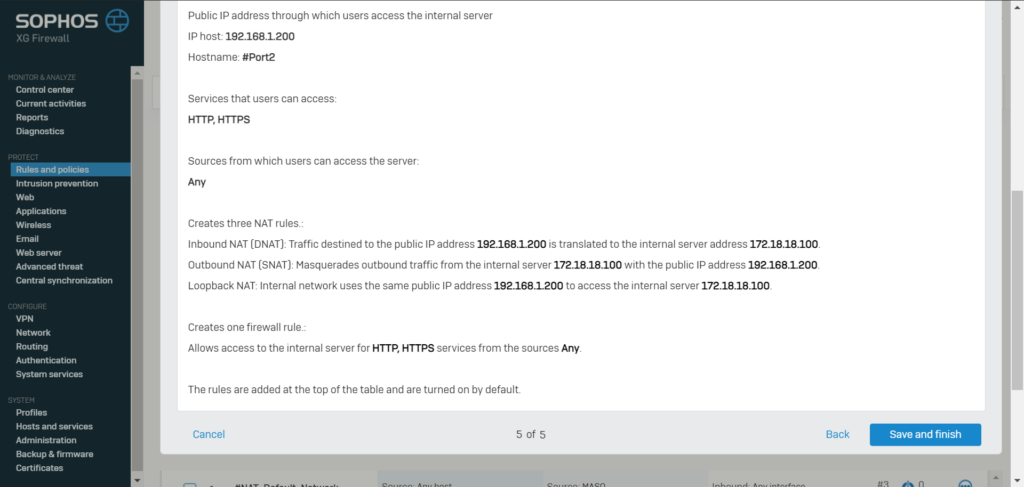
- Ở mục Internal server IP address: Chọn host web server đã tạo trước đó

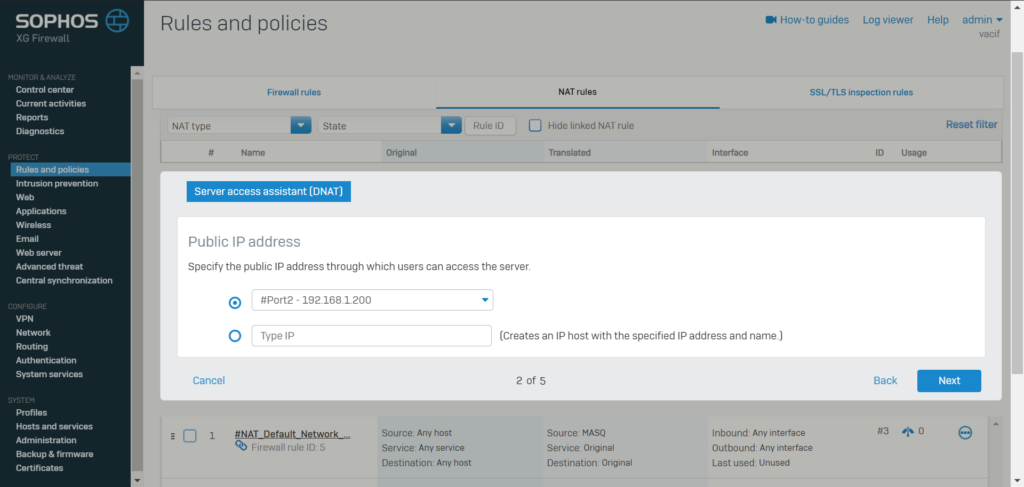
- Ở mục Public IP address: Chọn cổng WAN mà bạn muốn NAT

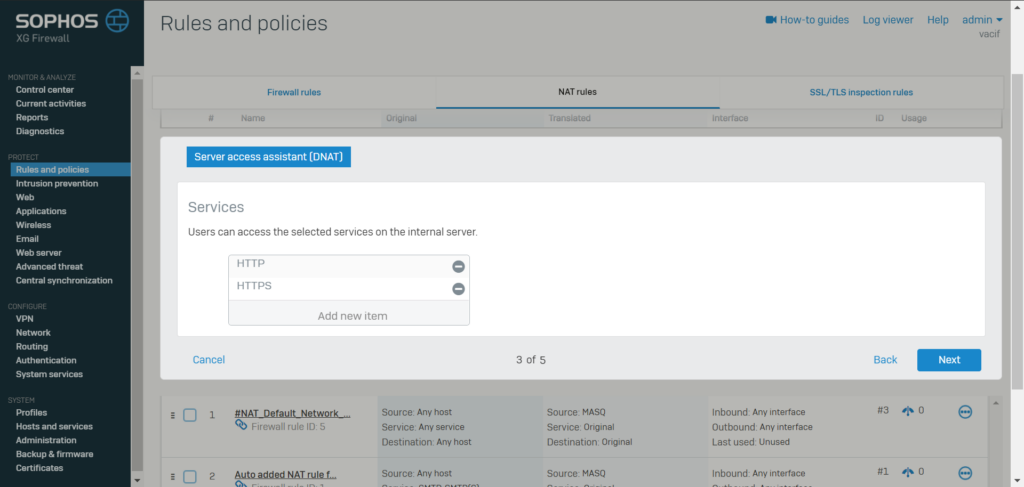
- Ở mục Services: Chọn HTTP, HTTPS

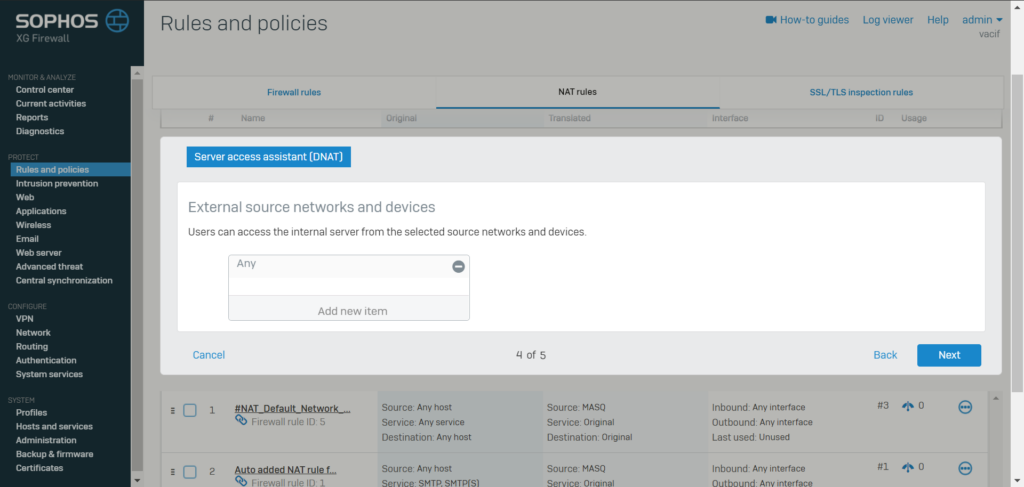
- Ở mục External source networks and devices: Chọn Any

- Nhấn Save and finish

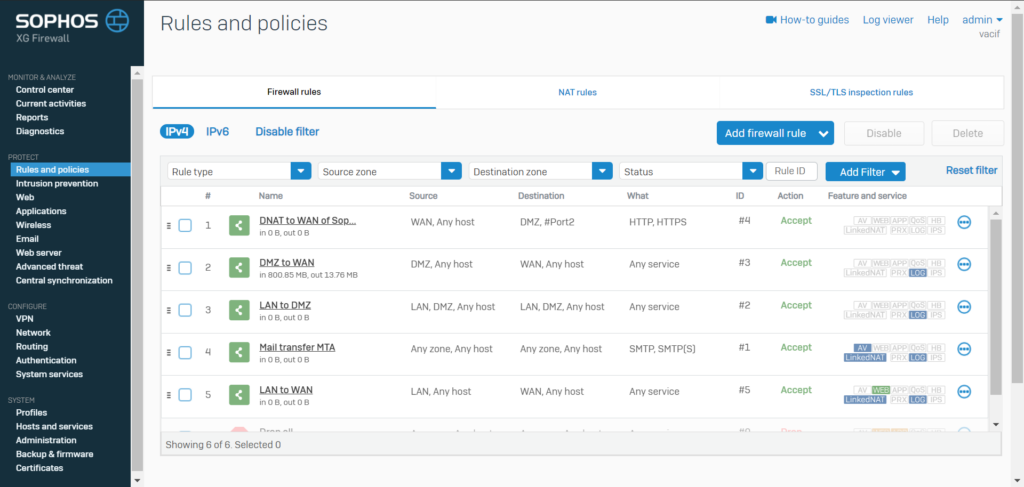
- Sau khi tạo DNAT, Sophos sẽ tự động tạo cho ta 1 firewall rule

Firewall 1
- Đăng nhập vào Sophos firewall bằng quyền Admin
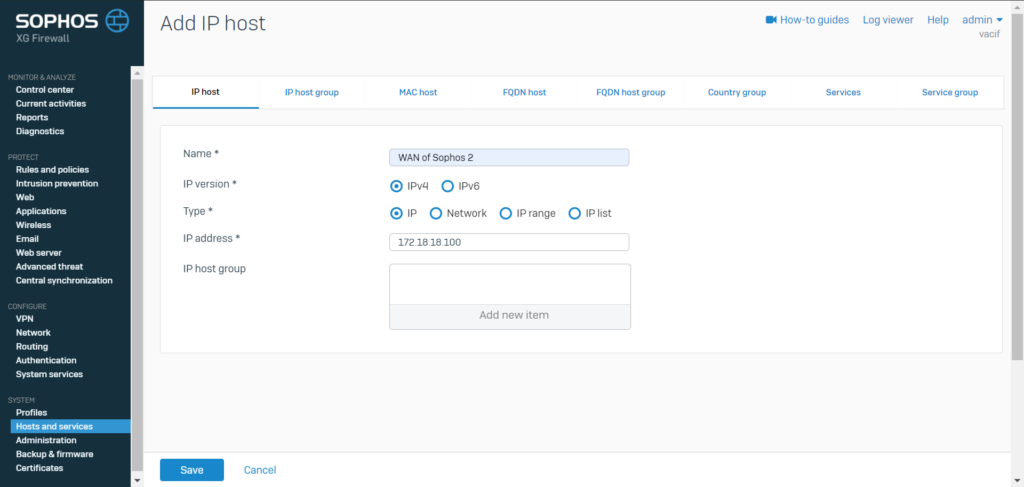
- Đi đến mục Hosts and services -> Chọn mục IP host -> Nhấn Add
- Đặt tên
- Ở mục IP version: Chọn IPv4
- Ở mục Type: Chọn IP
- Ở mục IP address: Nhập 172.18.18.18 là IP WAN của firewall Sophos 2
- Đi đến mục Rules and policies -> Chọn mục NAT rules -> Nhấn Add NAT rule -> Chọn Server access assistant (DNAT)
- Ở mục Internal server IP address: Chọn host WAN của firewall Sophos 2 đã tạo trước đó -> Nhấn Next
- Ở mục Public IP address: Chọn port WAN của firewall Sophos 1 -> Nhấn Next
- Ở mục Services: Chọn HTTP, HTTPS -> Nhấn Next
- Ở mục External source networks and devices: Chọn Any -> Nhấn Next
- Nhấn Save and finish
- Sophos sẽ tự động tạo firewall rule
Thực hiện kiểm tra truy cập