Overview
Bài viết hướng dẫn cách cấu hình đồng bộ user giữa Azure AD và Sophos Central. Việc đồng bộ sẽ giúp dễ dàng quản lý người dùng trên Sophos Central. Quản trị viên chỉ cần thay đổi trên Azure AD thì user trên Sophos Central sẽ thay đổi tương tự. Điều đó giúp hỗ trợ giảm bớt thời gian trong việc quản lý
Sơ đồ hoạt động

Các bước cấu hình
- Tạo Azure Application
- Tạo client secret
- Cấu hình Application permissions
- Lấy thông tin tenant domain và nhập trên Sophos Central
- Kiểm tra user trên Sophos Central
Hướng dẫn cấu hình
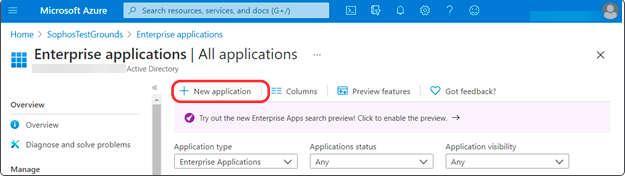
Tạo Azure Application
- Đăng nhập vào Azure portal -> Đi đến mục Azure Active Directory -> Chọn Enterprise applications -> Nhấn New application
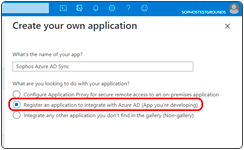
- Nhấn Create your own application
- Nhập tên cho app
- Nhấn Register an application to integrate with Azure AD (App you’re developing) -> Nhấn Create
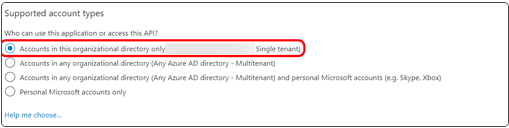
- Ở mục Supported account types -> Chọn Accounts in this organizational directory only (Single tenant)
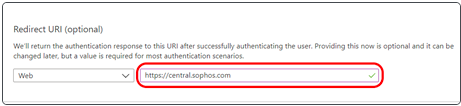
- Ở mục Redirect URI (optional) -> Chọn Web và nhập https://central.sophos.com -> Nhấn Register
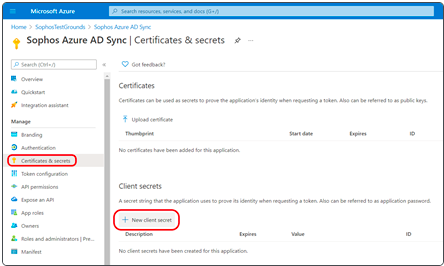
Tạo client secret
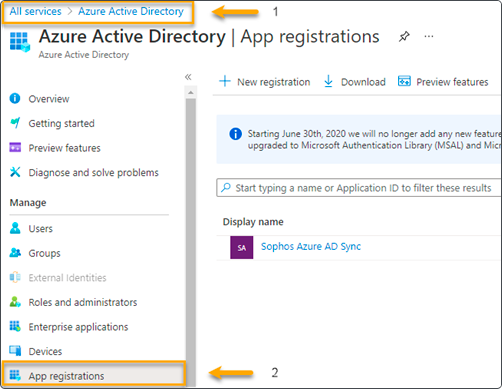
- Đi đến mục Azure Active Directory -> Nhấn App registrations -> Chọn ứng dụng mà bạn đã tạo trước đó
- Đi đến mục Certificates & secrets -> Nhấn New client secret
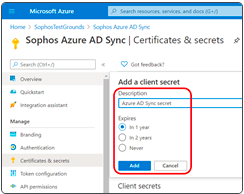
- Đặt decriptions cho client -> Chọn Expires -> Nhấn Add -> Lưu lại thông tin client secret và client secret expiration ở mục Value
Cấu hình application permissions
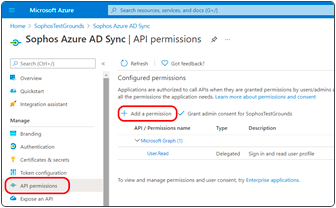
- Đi đến mục Azure Active Directory -> Chọn App registrations -> Chọn ứng dụng mà bạn đã tạo trước đó
- Chọn mục API permissions -> Nhấn Add a permission
- Chọn APIs my organization uses -> Chọn Windows Azure Active Directory
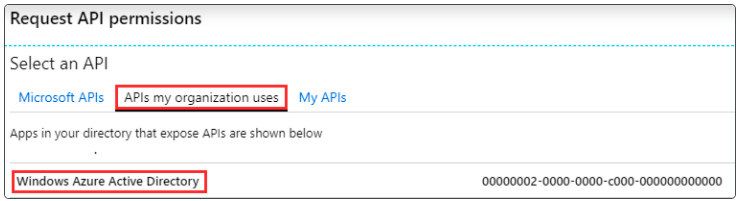
- Nhấn Add a permission
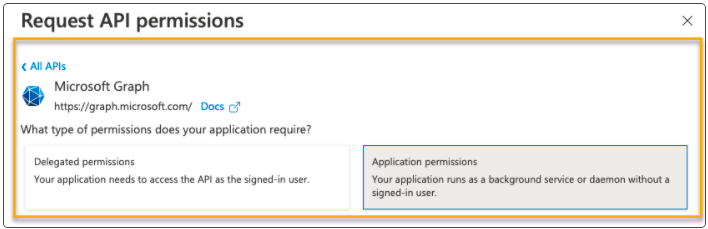
- Ở mục Request API Permission -> Chọn Microsoft Graph
- Ở mục What type of permissions does your application require? -> Chọn Application permissions
- Chọn Directory ->Chọn Directory.Read.All
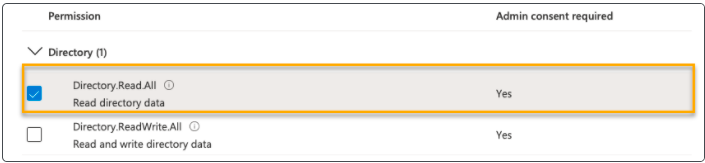
- Ở mục Grant consent -> Nhấn Grant admin consent for <account> -> Nhấn Yes
Lấy thông tin tenant domain và nhập trên Sophos Central
- Đi đến mục configuration của Azure AD -> Chọn Custom domain names -> Lấy các thông tin về tenant domain
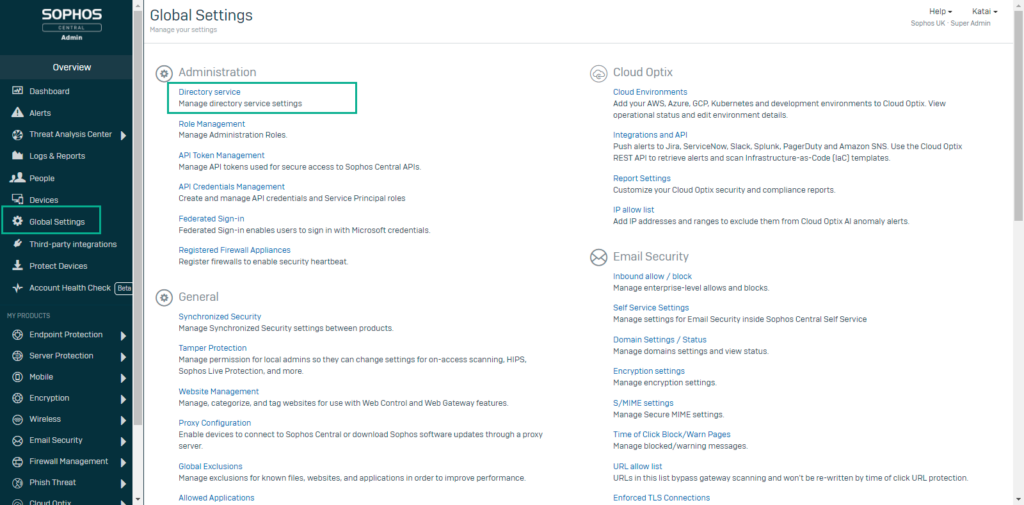
- Trên Sophos Central -> Chọn mục Global Settings -> Chọn Directory service
- Chọn mục Change directory service? -> Chọn Azure AD
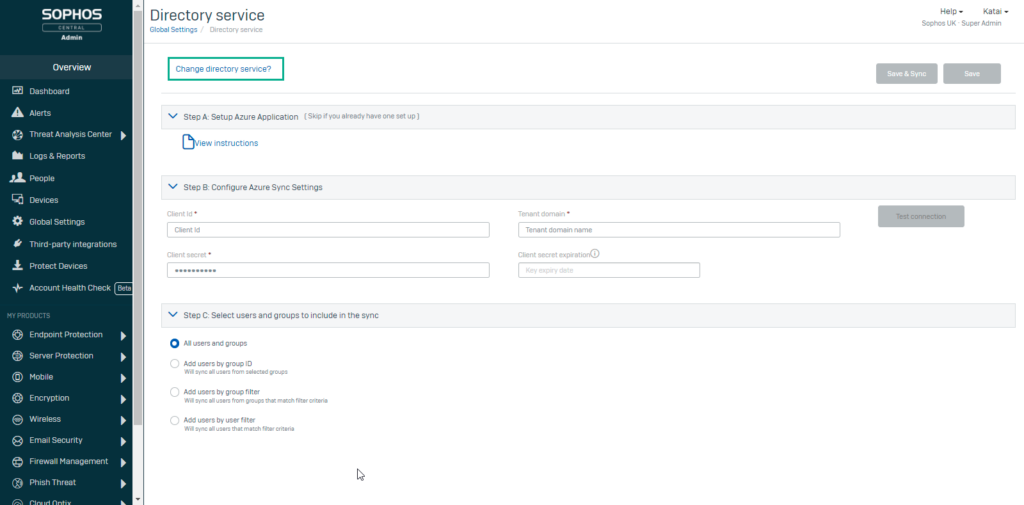
Ở mục Step B: Configure Azure Sync Settings -> Nhập các thông tin về tenant domain -> Nhấn Save & Sync
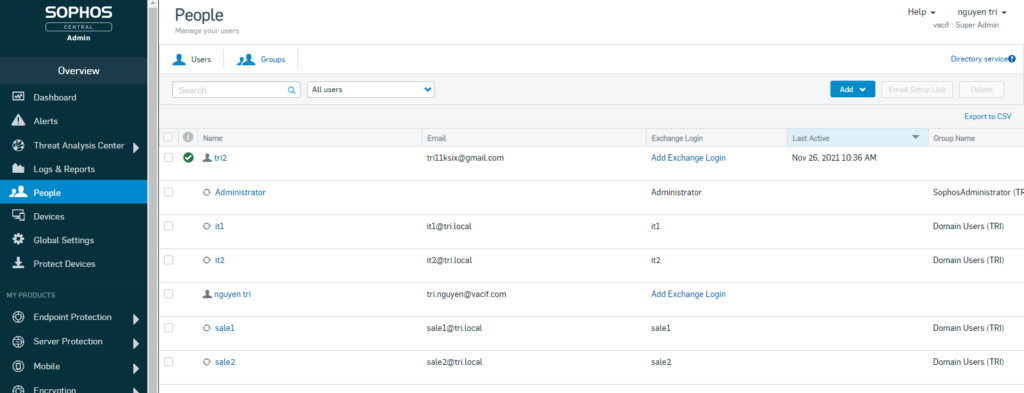
Kiểm tra user trên Sophos Central
- Ta vào Sophos central để xem. Những user được đồng bộ qua AD sẽ có ký hiệu xoáy tròn ở phía trước