1. Mục đích bài viết
Bài viết này sẽ hướng dẫn các bạn cách triển khai gỡ phần mềm Sophos Endpoint bằng Group Policy, phương thức này thường được áp dụng để gỡ nhiều máy tính cùng một lúc và không làm ảnh hưởng đến user.
2. Sơ đồ mạng, tính huống cấu hình và các bước cần thực hiện
2.1 Sơ đồ mạng
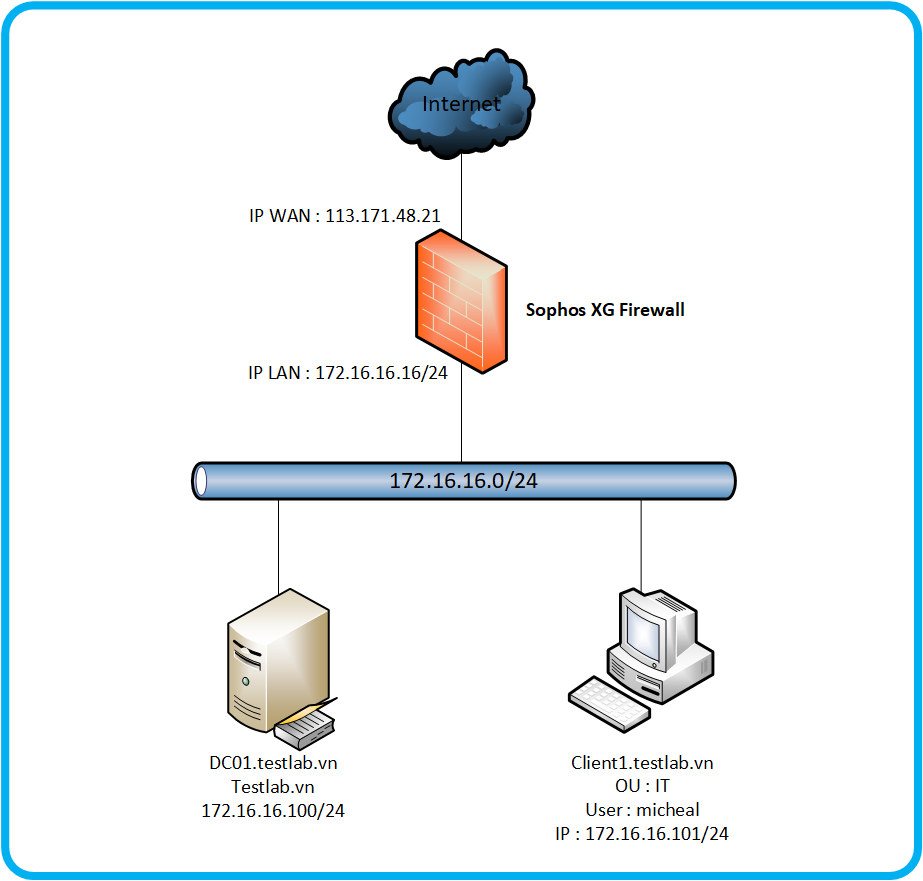
Sơ đồ mạng có các thành phần như sau :
- Thiết bị Sophos XG sẽ kết nối với internet thông qua ip tĩnh 113.171.48.21.
- Thiết bị Sophos XG là thiết bị cấp DHCP với lớp mạng 172.16.16.0/24 và địa chỉ ip cổng LAN là 172.16.16.16/24.
- Phía dưới thiết bị Sophos XG là 1 server domain controller tên là dc01.testlab.vn có ip 172.16.16.100/24 và 1 máy PC đã được john domain tên là Client1.testlab.vn, có ip 172.16.16.101/24, đang đang nhập tài khoản domain là michael thuộc OU IT và đã được cài đặt Sophos Endpoint.
2.2 Tình huống cấu hình
Chúng ta sẽ thực hiện cấu hình gỡ phần mềm Sophos Endpoint trên máy Client01 bằng cách tạo Group Policy trên máy Windows Server DC01 và áp dụng policy đó xuống máy Client01.
2.3 Các bước cấu hình
- Tạo thư mục share trên Windows Server.
- Chuẩn bị đoạn scripts để gỡ Sophos Endpoint.
- Tạo group policy.
- Kiểm tra kết quả.
3. Hướng dẫn cấu hình
3.1 Tạo thư mục share
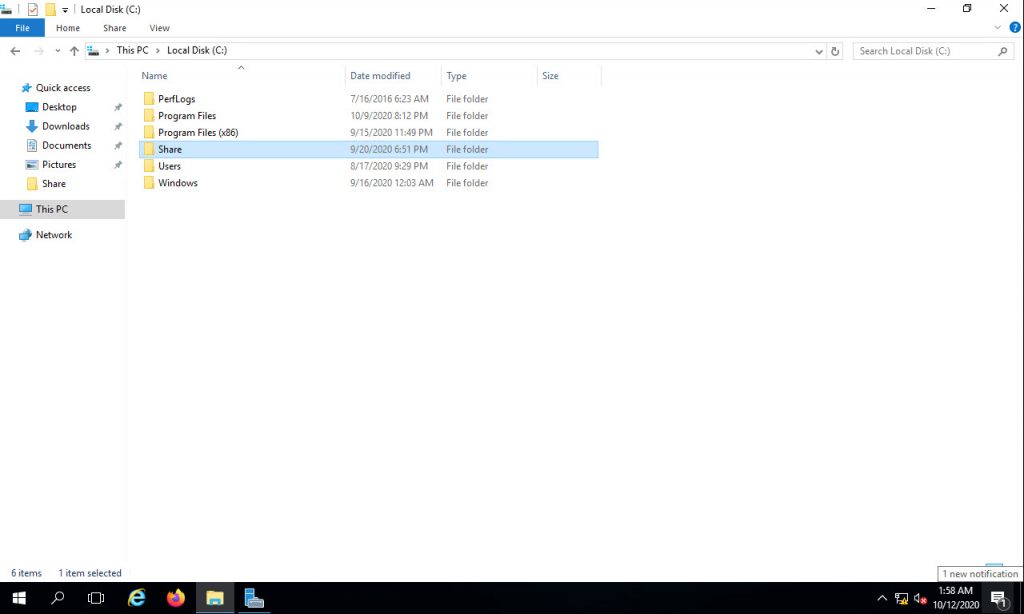
Bước đầu tiên chúng ta cần làm là tạo một thư mục share để chứa file scripts dùng để gỡ sophos endpoint giúp các máy trạm có thể truy cập vào để thực thi file scripts.
Ở đây chúng ta sẽ tạo thư mục tên là Share trên ổ C của máy windows server.
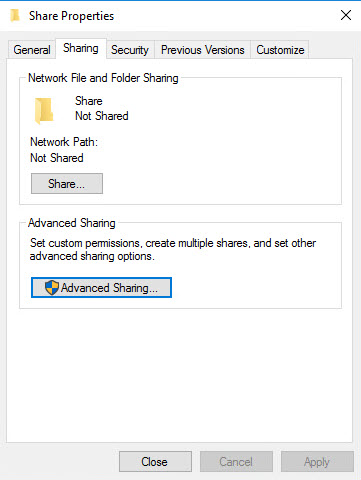
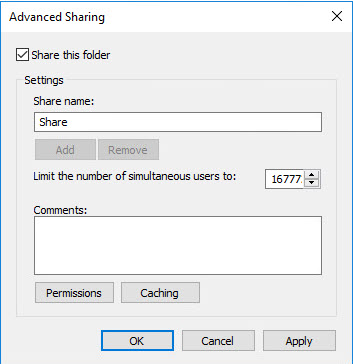
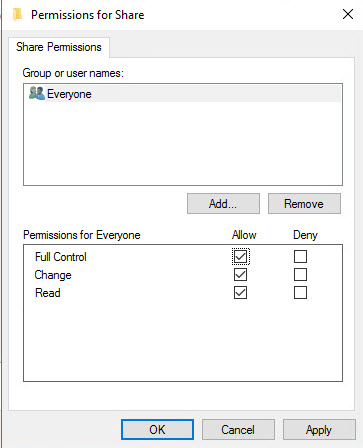
Tiếp theo chúng ta sẽ thực hiện cấu hình chia sẻ thư mục này bằng cách click phải vào thư mục > chọn Propertise > Sharing > Advanced Sharing… > tích chọn Share this folder > Permission > tích chọn Allow ở Full Control và click OK để đóng các tab.
3.2 Chuẩn bị đoạn scripts
Chúng ta cần chuẩn bị một đoạn scripts để thực hiện tự động gỡ cài đặt sophos endpoint ngầm mà không ảnh hưởng đến người dùng.
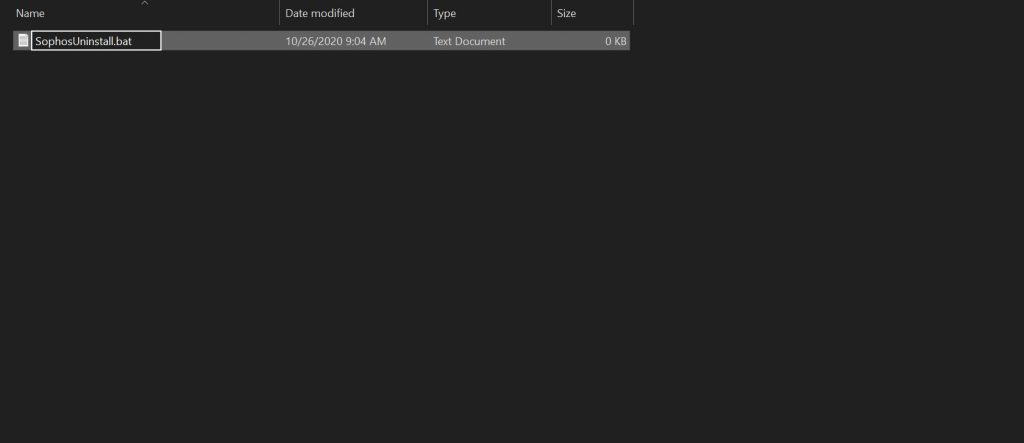
Chúng ta tạo một file text tên SophosUninstall, mở nó lên và copy đoạn scripts dưới đây vào file text và lưu nó vào thư mục Share.
net stop "SAVService"
net stop "Sophos AutoUpdate Service"
"C:\Program Files\Sophos\Sophos Endpoint Agent\uninstallcli.exe"
:Sophos AutoUpdate XG Endpoint (6.0.457.0) Server (6.0.457.0)
MsiExec.exe /qn /X{72E136F7-3751-422E-AC7A-1B2E46391909} REBOOT=ReallySuppress
MsiExec.exe /qn /X{7CD26A0C-9B59-4E84-B5EE-B386B2F7AA16} REBOOT=ReallySuppress
MsiExec.exe /qn /X{BCF53039-A7FC-4C79-A3E3-437AE28FD918} REBOOT=ReallySuppress
MsiExec.exe /qn /X{9D1B8594-5DD2-4CDC-A5BD-98E7E9D75520} REBOOT=ReallySuppress
MsiExec.exe /qn /X{AFBCA1B9-496C-4AE6-98AE-3EA1CFF65C54} REBOOT=ReallySuppress
MsiExec.exe /qn /X{E82DD0A8-0E5C-4D72-8DDE-41BB0FC06B3E} REBOOT=ReallySuppress
:Sophos Anti-Virus Endpoint 10.8.3.441
MsiExec.exe /qn /X{85F78DA7-8E8E-49C9-969F-A62D2B43C046} REBOOT=ReallySuppress
MsiExec.exe /qn /X{8123193C-9000-4EEB-B28A-E74E779759FA} REBOOT=ReallySuppress
MsiExec.exe /qn /X{36333618-1CE1-4EF2-8FFD-7F17394891CE} REBOOT=ReallySuppress
MsiExec.exe /qn /X{DFDA2077-95D0-4C5F-ACE7-41DA16639255} REBOOT=ReallySuppress
MsiExec.exe /qn /X{CA3CE456-B2D9-4812-8C69-17D6980432EF} REBOOT=ReallySuppress
MsiExec.exe /qn /X{CA524364-D9C5-4804-92DE-2800BDAC1AA4} REBOOT=ReallySuppress
MsiExec.exe /qn /X{3B998572-90A5-4D61-9022-00B288DD755D} REBOOT=ReallySuppress
MsiExec.exe /qn /X{4BAF6F55-FFE4-4A3A-8367-CC2EBB0F11C3} REBOOT=ReallySuppress
MsiExec.exe /qn /X{BA8752FE-75E5-43DD-9913-23509EFEB409} REBOOT=ReallySuppress
:Sophos Anti-Virus Server 10.8.4.227
MsiExec.exe /qn /X{01423865-551B-4C59-B44A-CC604BC21AF3} REBOOT=ReallySuppress
MsiExec.exe /qn /X{72E30858-FC95-4C87-A697-670081EBF065} REBOOT=ReallySuppress
MsiExec.exe /qn /X{66967E5F-43E8-4402-87A4-04685EE5C2CB} REBOOT=ReallySuppress
MsiExec.exe /qn /X{2519A41E-5D7C-429B-B2DB-1E943927CB3D} REBOOT=ReallySuppress
MsiExec.exe /qn /X{6654537D-935E-41C0-A18A-C55C2BF77B7E} REBOOT=ReallySuppress
:Sophos System Protection
MsiExec.exe /qn /X{934BEF80-B9D1-4A86-8B42-D8A6716A8D27} REBOOT=ReallySuppress
MsiExec.exe /qn /X{1093B57D-A613-47F3-90CF-0FD5C5DCFFE6} REBOOT=ReallySuppress
:Sophos Network Threat Protection Endpoint (1.8.1555) Server (1.8.1555)
MsiExec.exe /qn /X{604350BF-BE9A-4F79-B0EB-B1C22D889E2D} REBOOT=ReallySuppress
:Sophos Health Endpoint (2.1.0.33) Server (2.0.6.828)
MsiExec.exe /qn /X{80D18B7B-8DF1-4BCA-901F-BEC86BAE2774} REBOOT=ReallySuppress
MsiExec.exe /qn /X{A5CCEEF1-B6A7-4EB4-A826-267996A62A9E} REBOOT=ReallySuppress
MsiExec.exe /qn /X{D5BC54B8-1DA1-44F4-AE6F-86E05CDB0B44} REBOOT=ReallySuppress
MsiExec.exe /qn /X{E44AF5E6-7D11-4BDF-BEA8-AA7AE5FE6745} REBOOT=ReallySuppress
:Sophos Diagnostic Utility Endpoint (1.24.0.2) Server (1.24.0.2)
MsiExec.exe /qn /X{4627F5A1-E85A-4394-9DB3-875DF83AF6C2} REBOOT=ReallySuppress
:Heartbeat
MsiExec.exe /qn /X{DFFA9361-3625-4219-82C2-9EF011E433B1} REBOOT=ReallySuppress
:Sophos Management Communications System Endpoint (4.10.423.0) Server (4.10.423.0)
MsiExec.exe /qn /X{A1DC5EF8-DD20-45E8-ABBD-F529A24D477B} REBOOT=ReallySuppress
MsiExec.exe /qn /X{1FFD3F20-5D24-4C9A-B9F6-A207A53CF179} REBOOT=ReallySuppress
MsiExec.exe /qn /X{D875F30C-B469-4998-9A08-FE145DD5DC1A} REBOOT=ReallySuppress
MsiExec.exe /qn /X{2C14E1A2-C4EB-466E-8374-81286D723D3A} REBOOT=ReallySuppress
"C:\Program Files (x86)\Sophos\Management Communications System\Endpoint\Uninstall.exe" /uninstall /quiet
:Sophos Endpoint UI Endpoint (1.7.452.0) Server (1.7.452.0)
MsiExec.exe /qn /X{D29542AE-287C-42E4-AB28-3858E13C1A3E} REBOOT=ReallySuppress
:Sophos Endpoint Firewall Endpoint (1.1.0.0) Server (1.1.0.0)
MsiExec.exe /qn /X{2831282D-8519-4910-B339-2302840ABEF3} REBOOT=ReallySuppress
:Sophos Endpoint Self Help Endpoint (2.2.17.0) Server (2.2.17.0)
MsiExec.exe /qn /X{B9C2F07D-1137-4E3D-B22B-05144293EF42} REBOOT=ReallySuppress
MsiExec.exe /qn /X{4EFCDD15-24A2-4D89-84A4-857D1BF68FA8} REBOOT=ReallySuppress
MsiExec.exe /qn /X{BB36D9C2-6AE5-4AB2-BC91-ECD247092BD8} REBOOT=ReallySuppress
:Sophos Lockdown 7.1.2
MsiExec.exe /qn /X{77F92E90-ED4F-4CFF-8F60-3E3E4AEB705C} REBOOT=ReallySuppress
:Sophos Exploit Prevention Endpoint (3.7.14.40) Server (3.7.14.40)
"C:\Program Files (x86)\HitmanPro.Alert\Uninstall.exe" --quiet
:Sophos File Scanner Endpoint (1.5.15.0) Server (1.5.15.0)
"C:\Program Files\Sophos\Sophos File Scanner\Uninstall.exe"
:Sophos Standalone Engine Endpoint (1.2.24) Server (1.2.24)
"C:\Program Files\Sophos\Sophos Standalone Engine\Uninstall.exe"
:Sophos ML Engine Endpoint (1.2.16) Server (1.1.149)
"C:\Program Files\Sophos\Sophos ML Engine\Uninstall.exe"
:Sophos Endpoint Agent Endpoint (2.4.1) Server (2.2.7)
"C:\Program Files\Sophos\Sophos Endpoint Agent\uninstallgui.exe"
:Sophos Clean Endpoint (3.8.6.1) Server (3.8.6.1)
"C:\Program Files (x86)\Sophos\Clean\uninstall.exe"
:Sophos Endpoint Defense Endpoint (2.1.3.26) Server (2.1.3.44)
"C:\Program Files\Sophos\Endpoint Defense\uninstall.exe"
:HitmanPro.Alert 3 (managed by Sophos) Endpoint (3.7.14.40) Server (3.7.14.40)
"C:\Program Files (x86)\HitmanPro.Alert\hmpalert.exe" /uninstall /quiet
:HMPA 1.0.0.699
"C:\Program Files (x86)\HitmanPro.Alert\uninstall.exe" --quiet
:HMPA 3.7.14.265
"C:\Program Files\HitmanPro\HitmanPro.exe" /uninstall /quiet
:Sophos File Integrity Monitoring Server (1.0.1.11)
MsiExec.exe /qn /X{425063CE-9566-43B8-AC61-F8D182828634} REBOOT=ReallySuppress
:Sophos Managed Detection and Response Endpoint (1.0.1.44)
"C:\Program Files\Sophos\Managed Detection and Response\SophosMDRUninstall.exe"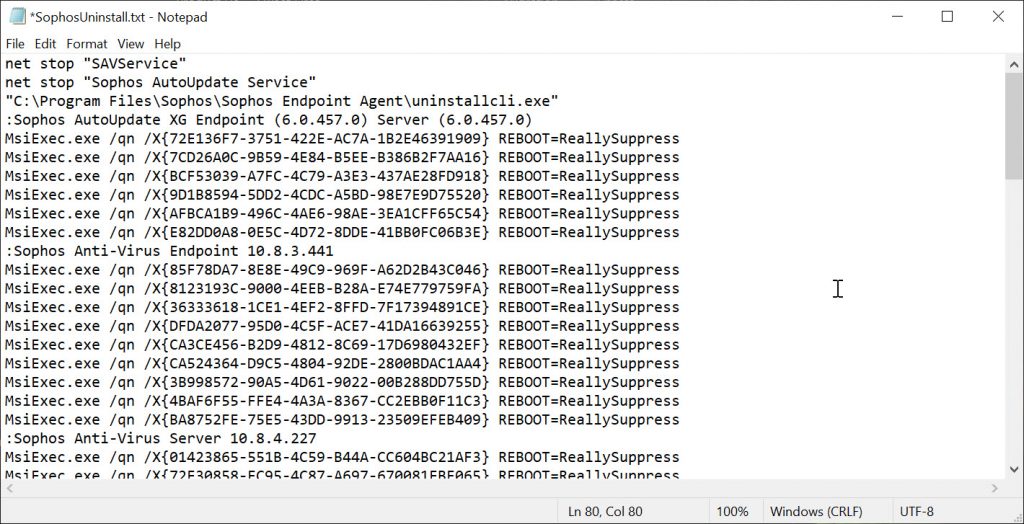
Sau khi tạo file text SophosInstall xong, lúc này file SophosUninstall đang có đuôi .txt.
Để chuyển sang file có đuôi .bat chúng ta click chuột phải vào file > chọn Remane và sửa lại phần đuôi file từ .txt sang .bat.
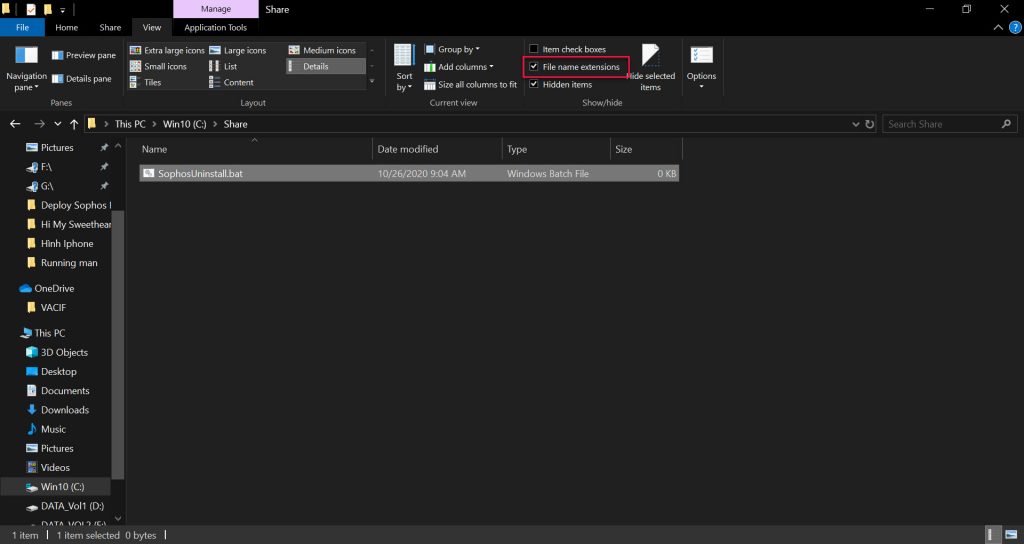
Lưu ý nếu bạn chọn Remane mà đuôi file không hiện ra cho bạn chỉnh sửa bạn cần làm thao tác sau đây.
Trên thư mục Share ở thanh công cụ bạn chọn tab View và tích vào ô File name extension.
3.3 Tạo Group Policy
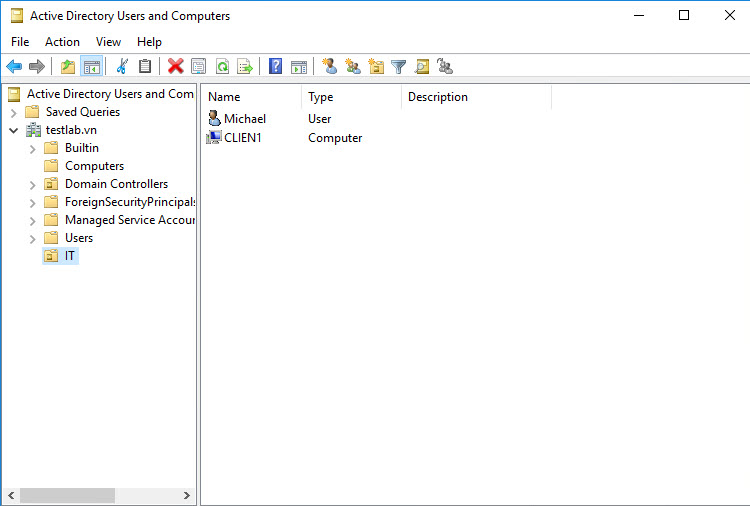
Trước khi tạo policy chúng ta cần lưu ý rằng policy này chỉ áp dụng dành cho thiết bị không phải user nên chúng ta cần chuyển thiết bị của máy Client1 sang OU IT mà chúng ta áp dụng policy.
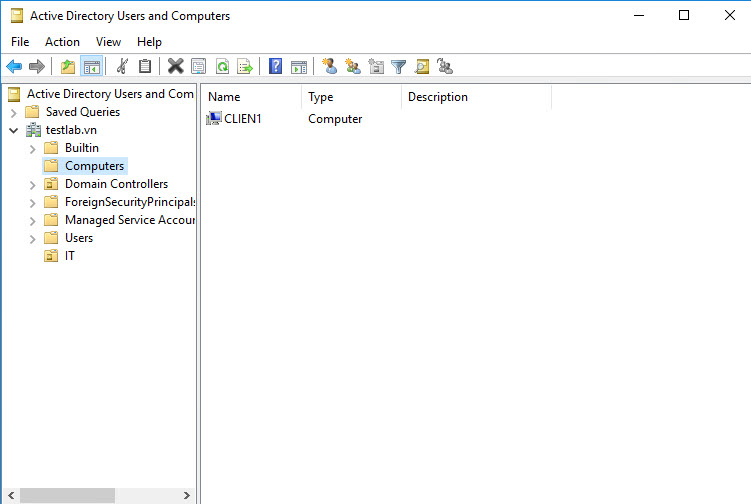
Để chuyển thiết bị các bạn mở Server Manager > chọn Tools > Active Directory Users and Computers, bảng Active Directory Users and Computers hiện lên.
Chú ý vào phần OU Computer, đây là nơi chứa các thiết bị đã được john domain.
Để chuyển thiết bị này sang OU mong muốn bạn chỉ cần kéo thả chúng vào OU mà bạn chuyển, ở bài viết này mình sẽ chuyển nó sang OU IT.
Để tạo gourp policy chúng ta cần truy cập vào Group Policy Management.
Để truy cập chúng gõ Administrative ở ô tìm kiếm trên windows > chọn Windows Administrative Tool > chọn Group Policy Management.
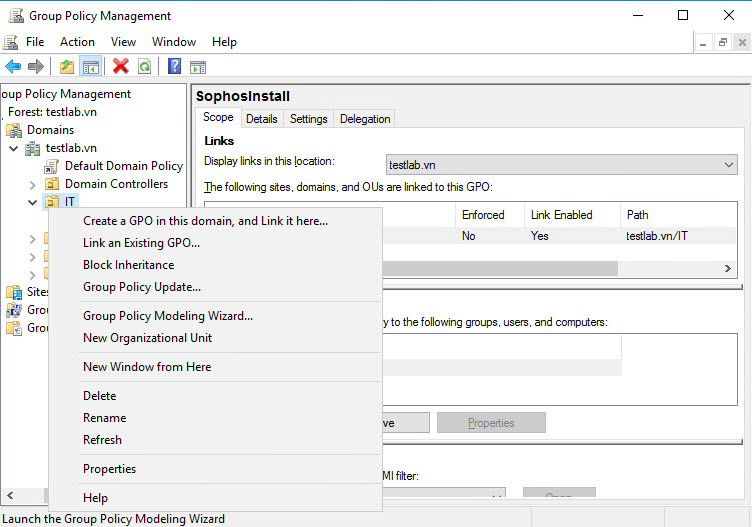
Tiếp theo vào Group Policy Management > Forest : testlab.vn > Domains > testlab.vn.
Ở đây chúng ta sẽ tạo policy cho OU IT để tạo click chuột phải vào OU IT và chọn Create a GPO in this domain, and Link it here… .
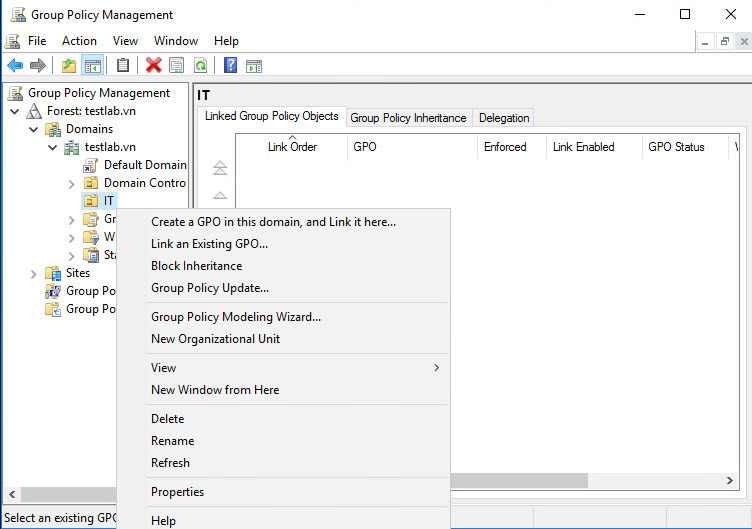
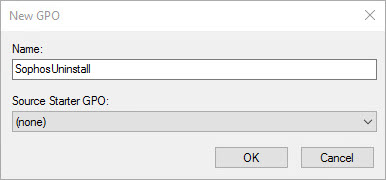
Đặt tên cho policy là SophosUninstall và click OK.
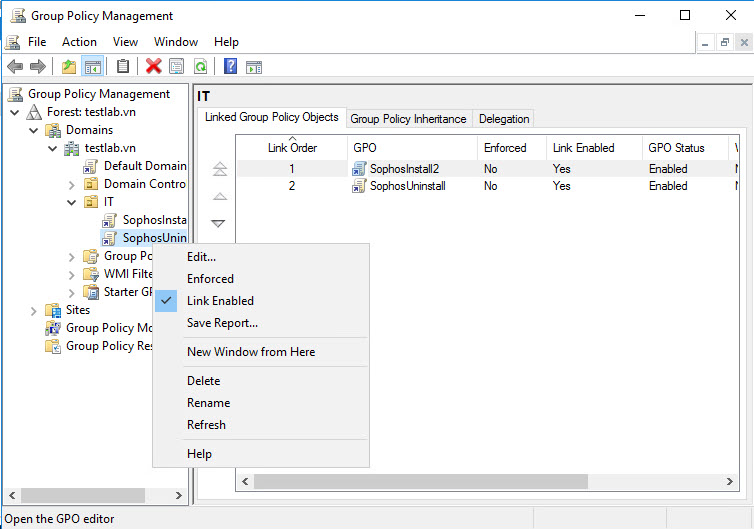
Sau khi policy SophosUninstall được tạo, click chuột phải vào nó và chọn Edit.
Bảng Group Policy Management hiện ra, truy cập theo đường dẫn SophosUninstall [DC01.TESTLAB.VN] > Computer Configuration > Policies > Windows Settings > Scripts (Startup/Shutdown) và nhấn đúp chuột trái vào Startup ở bảng bên phải.
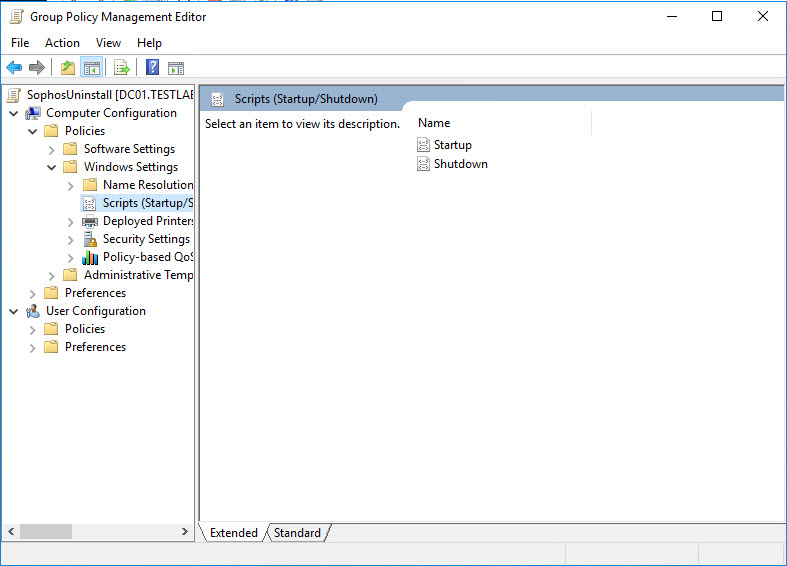
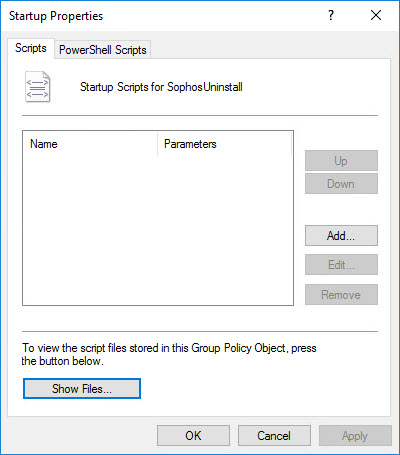
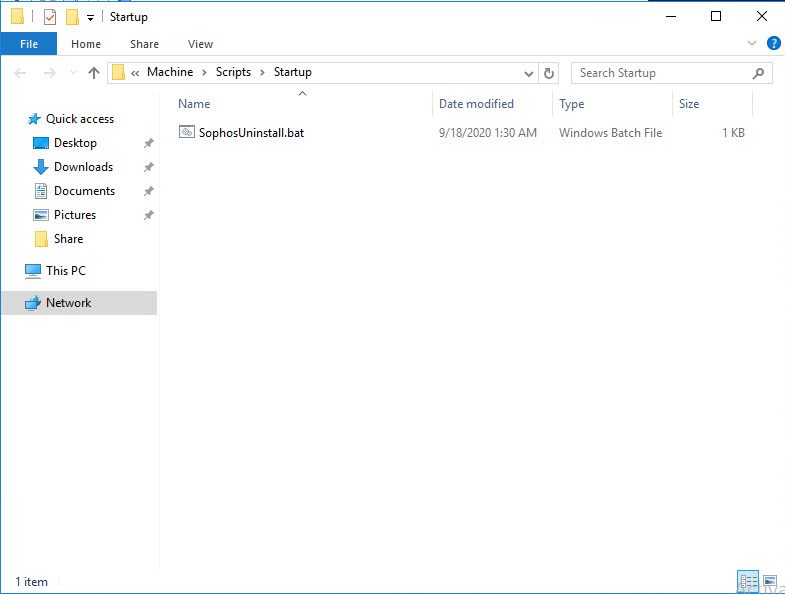
Lúc này bảng Startup Propertise xuất hiện chúng ta click chuột vào Show Files, lúc này thư mục Startup xuất hiện đây là nơi chứa các scripts sẽ được thực thi, chúng ta cần copy file scripts SophosUninstall.bat đã chuẩn bị vào thư mục này.
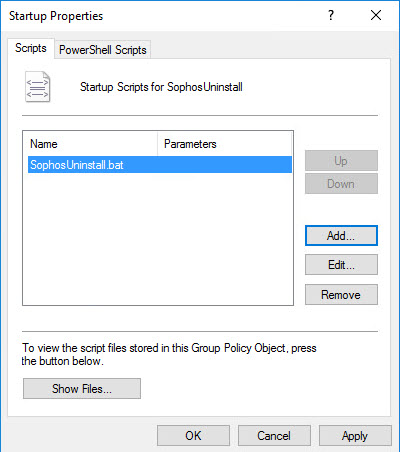
Quay trở lại với bảng Startup Propertise, chọn Add > chọn SophosUninstall.bat và nhấn OK để lưu.
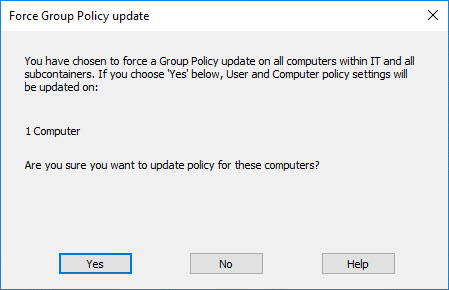
Quay trở lại với bảng Group Policy Management, click chuột phải vào OU IT nơi đang chứa policy SophosUninstall và chọn Group Policy Update.
Bảng Force Group Policy Update hiện ra, click Yes để update policy cho thiết bị và đợi 3 giây để hoàn thành.
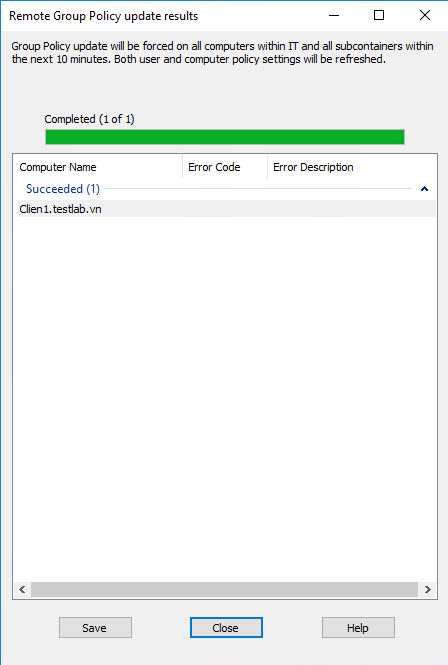
Sau khi hoàn thành nhấn Close để đóng cửa sổ.
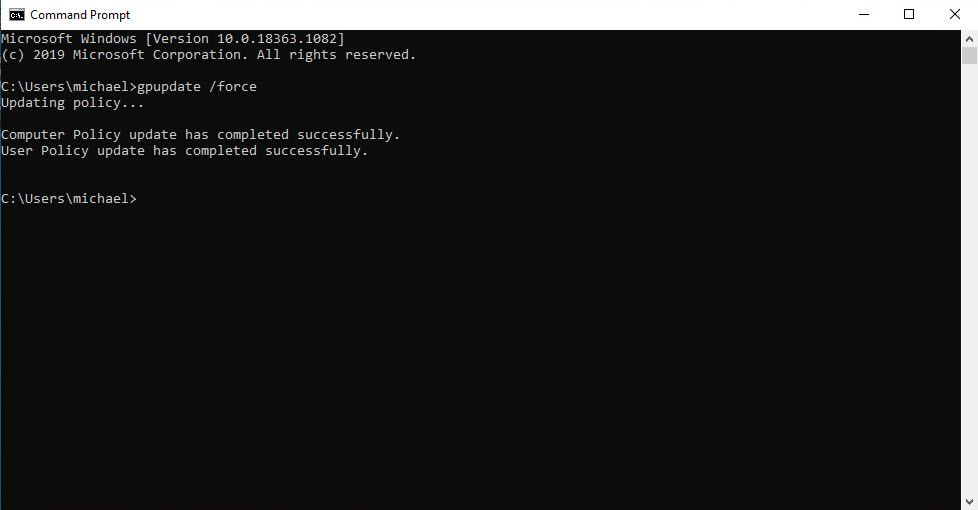
Tiếp theo chúng ta sẽ vào máy Client1, gõ vào thanh tìm kiến windows cmd để bật Command Prompt lên.
Gõ lệnh gpupdate /force và nhấn Enter để thực thi, chờ khoảng 3 giây để hoàn thành và thực hiện restart lại máy tính để máy tính cài đặt Sophos.
Chờ khoảng 10-15 để hoàn thành quá trình gỡ cài đặt Sophos Endpoint.